Saturday, June 30, 2007

Coop de Ville


The Ville of Westchester that is.

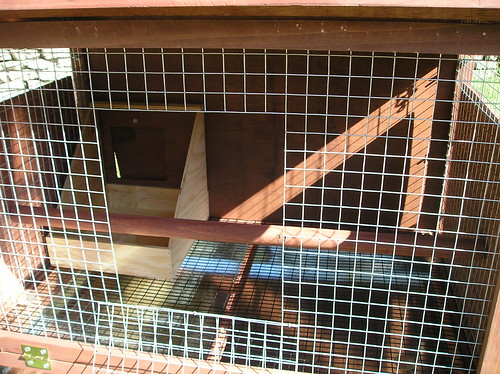
Got my Chick-n-Hutch yesterday (yes, that's what its actually called) and spent some time today putting it together.

Now, I know that I've mentioned before that I am seriously handicapped when it comes to handyman skills, but I really think my difficulties were not entirely my fault. The directions came with the sort of blurry, inconclusive drawings that I formerly would have associated only with Ikea furniture. Not only were the directions very misleading, but the whole thing is full of badly drilled holes that don't match up, extra holes that seem to have no purpose and are not referenced at all, missing wing-nuts and even (this was my favorite) a pre-drilled hole for a screw that was then covered in chicken wire. Brilliant, Chickn-Hutch guys! Really. A big thumbs-up for you.


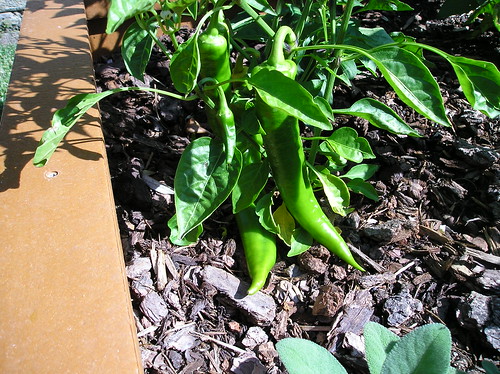
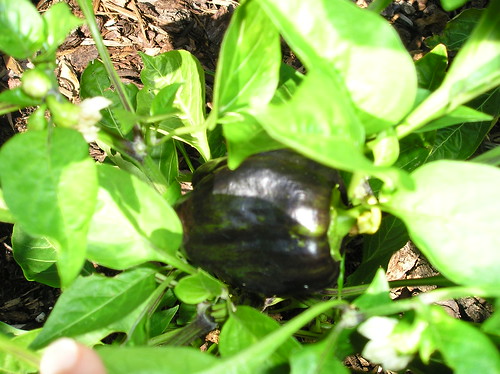
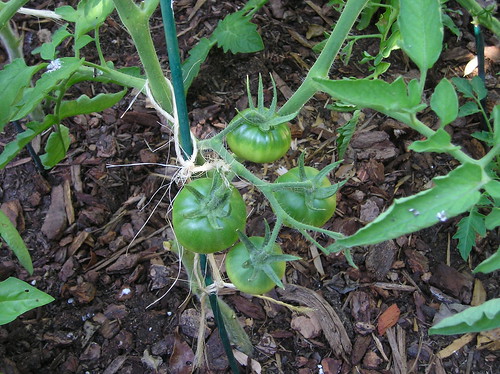
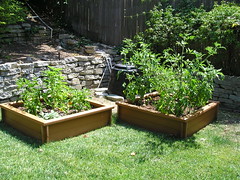
Anyway, after a couple of hours sweating in the sun to do a job that should have taken about 20 minutes, I have this. Next I get to put the actual run together..but I think that will have to wait for tomorrow. It's time to grab a beer for now and check out my peppers and tomatoes, which are loving this heat.


Wednesday, June 27, 2007

Holy #$@ I've done it now......

I ordered a chicken coop! I know, I know, my sister will think I'm an idiot for buying one instead of making it, and my mother will think I'm an idiot, period. But I did a lot of research and this one is honestly cheaper than I could actually make it for myself. Plus it comes with the run and nest box.

Next comes ordering some actual chicks! There are some feed stores around Los Angeles that sell them, but after doing a lot of research, I have a specific breed in mind, and the feed stores never know what they'll have in stock. It's pretty much a crapshoot.

There's also the question of where to send them. If I have them sent to work, I can be sure of being here to receive them. I'll also delight the HECK out of my co-workers. On the other hand, the building security people might give the mailman a hard time.

I'm a bit nervous but excited, thanks to all the great help I got from other backyard chicken keepers on the forums at www.backyardchickens.com.

Monday, June 25, 2007

Crap, no Whole Foods? Now what??

At the moment I'm deep into Michael Pollan's mind-blowing book "The Omnivore's Dilemna." I can't decide if everyone should read this book, or whether I wish I never had.

No, I take that back. I'm glad I read this book, if only because it's incredibly fascinating stuff. Who knew that corn is basically a freak of nature, that without human interference, would go extinct within a couple of years? Or that Whole Foods market, contrary to the rosy portrait they present of produce and meats from idyllic pastoral settings, is not much different than any other giant industrial supermarket? (I was particularly crushed at finding that "free-range" chicken doesn't mean at all what I thought it meant.)

The good news is that reading the book has really fired up my desire to get my little property to produce more food stuffs, at the same time with less pollution and waste. Today I started researching what CSA's (Community Supported Agriculture) opportunities are available in this area. I might even volunteer to be a drop-off point for some local farms if I can get enough people interested. Localharvest.org has a lot of great resources already; just put in your zip code to find what's available in your area.

Also, I've rekindled my interest in chickens! My sister keeps trying to convince me that we can make our own from old plywood and some chicken wire, but I think she seriously overestimates our building skills. (See: a typical attempt at making something.)

Thursday, June 14, 2007

Thank God I Never Went To Medical School


Because I would SUCK at being a surgeon.


I finally got around to pruning my tomatoes again yesterday. I'd done a good pruning a few weeks ago, but the instructions in the article I got from a friend's husband specifically say to prune the lower branches AFTER the first flowers appear. This ended up meaning, on several of the tomatoes, that there were thick, vigorous branches all OVER there place before the flowers appeared. Since I felt mighty sad about hacking off perfectly lovely branches with great big, bright green leaves, I probably waited a bit longer than I should have.

So it was with no small amount of trepidation that I finally made myself head out yesterday evening to do the deed.

Now, I wanted to follow the instructions to the letter, so I did use a razor blade, rather than clumsy scissors, to make a nice, neat, surgical cut. However, while I did make neat cuts, I'm almost POSITIVE the instructions didn't say "now have some sort of spasm and slice off a layer half-way down the plant too, like a total git." I mean, I read it twice, and I don't think that was either implicit, or implied, in the instructions.

So then I had to spend the next 15 minutes apologizing to my poor plants, in an almost Buddhist like belief that if I was at least sorry for my butchery the plants would forgive me and not cack on me.

Anyway, the good news is that the peppers are totally undaunted. They don't have to suffer my pruning skills like the tomatoes, and are gleefully putting out fruit. SO much fruit in fact, that I'm a little concerned about a couple of them. How can a plant, only 7 or 8 inches high, put out so many already large fruits, without just falling over in exhaustion? It's a bit like stumbling across a very short man with a severe case of elephantitis of the testicles. I don't know whether to be concerned or impressed.

In any case, here's the photographic updates.


Monday, June 11, 2007

Yes, I KNOW You Don't Knead to Make Bread....

Today's post title is courtesy of an absolutely dreadful joke made by my friend S. I apologize on her, and my, behalf.

This past weekend I made Bread v.2, thanks to an extraordinary article in the New York Times that my mother forwarded to me (thanks Mom!). You can read the article here (you may have to sign up with the NYT, but if you aren't already, you should be), but the gist of it is that, rather than knead the bread, you simply let time do the work for you. It does require more time than usual (12-18 hours for the first rise and about 2 more hours for the second) but if you are bit phobic about the whole bread-making process (as I am) then this recipe is a BOON. It's extremely simple and the results were extraordinary. My cast iron pot is quite large, so I got a large disk about 3 inches high at its peak (A smaller pot would have yielded a smaller and fatter loaf) that had a remarkable golden brown crust. After letting it cool, I sliced it up and toasted it to make a sandwich for my husband, who raved about it. It's the same texture as a freshly made baguette..simply wonderful.

If you don't want to read the whole article, here's the recipe.

How To Bake No-Knead Bread
About 30-60 minutes work plus 14 to 20 hours' total bread rising time.
Bread Ingredients:
3 cups all-purpose or bread flour, more for dusting *
¼ teaspoon instant yeast
1¼ teaspoons salt
Cornmeal or wheat bran as needed.

The type of flour used can be varied as you wish: white, whole wheat, or blends. The yeast MUST be instant or it's not going to work.

Starting The Bread Dough:
Mix your flour, yeast and salt in a large bowl. Add 1 5/8 cups water**, and mix ingredients gently until blended. The dough is a very wet and sticky one. Put a piece of plastic wrap over the bowl to cover it and then put it somewhere that's at least 70 degrees for the next 12 to 18 hours.

Preparing The Dough:
When you come back and check on your dough, it should be larger and sort of puffy-looking with lots of bubbles all over. Sprinkle some extra flour on a work surface and scoop the dough out of the bowl on the surface. Sprinkle the dough with a bit of the flour and fold it over just one or two times. Cover it with the plastic wrap that was on the dough bowl and let it sit there for about 15 minutes.

Shaping:
Lay out a clean cotton towel (a smooth texture one) and sprinkle it with flour/cornmeal/bran. You don't want to add too much flour at this point, so, using just enough flour to keep the dough from sticking to your hands, roll the dough into as tight a ball-shape as you can. Put the messier/seamed side of the ball down on the towel, sprinkle the dough with cornmeal/bran and cover with a second towel. Let the dough sit like this for two hours more. It should get a bit larger in size during this last rising.

Baking the Bread:
After the dough has risen for about 90 minutes of the two hours, start the oven pre-heating. Set it to 450 degrees AND put the pot you're going to bake the bread in into the oven to heat up too.

When the dough finishes rising, carefully take the pre-heated pot out of the oven. Carefully flip the dough off the towel and into the pot, which should make it seam-messy side up when it winds up in the pot. If the dough is crooked, wiggle the pot a bit. Then put the lid on and put it into the oven.

Bake for 30 minutes, then open oven and take off the pot lid. Bake for 15-30 minutes more until loaf is browned. Remove from oven, tip out of pot and cool on a rack.

Makes one loaf, about 1.5 lbs.

*I used bread flour, but I've heard people say they've used everything from AP to whole wheat to a mixture.
**This is what the recipe calls for, but I've seen several people say this yields too wet a dough (as was mine). If you watch the video that goes with this article, he actually says 1 1/2 cups of water, so I am wondering if the recipe misprinted. I'm going to try that next time.

Tuesday, June 5, 2007

It's Worth 1,000


At last, I can provide photo-journalistic evidence of my new garden! Matt managed to finally do what I was not, get our camera working again. He did this by using his incredible intuition about electronics, ie., how to scrape the corrosion funk off the battery terminal. Something I apparently could not figure out in the entirety of the 19 seconds I spent looking at the camera before declaring it hopelessly beyond repair, so I could then (natch) take to the web during work hours to look for a new camera. Darn him.

Anyway, so here are some photos of my progress so far. The tomatoes are looking good...they are all bright green and healthy looking. Almost time for another round of pruning and tying!


The peppers are coming along as well...two of the plants have already sprouted fruit (one of the bells and one of the banana types) and the rest are at least flowering. I'm a bit concerned about the dark black spots that have appeared at each junction that has flowers..is this normal? I can't seem to find a thing about it on the web.